|
DIY: An attempt to do a simple repair of a cracked luff of a (Neil Pryde RS) race or slalom sail.
OK, the luff of your (Neil Pryde RS Slalom or Racing?) sail has cracked – but what to do about it?
One option, of course, is to send the sail to a sail maker for having it repaired professionally, and at its best it will result in an almost as good as new sail.
Another option - considering that -
- perhaps the sail’s a little worn out, and you’re not quite confident that new (inherent) weaknesses won’t show up soon,
- a cracked repaired luff might remove some of the little “elasticity” from the repaired area of the luff, and thereby putting higher stress on the other areas, ultimately resulting in new cracks at other places in the luff(?).
- a professionally repaired sail might easily imply not having your sail for disposal for several weeks. And especially so if repaired through the authorized channels.
- a cracked luff can easily cost you 100-150 $/Euros – and that’s if the cracks haven’t spread to the panels/the monofilm behind the sleeve.
- is to trash the sail.
But apart from having the sail repaired or trashing it, is there yet another option? Yes perhaps - what about trying to repair it by yourself? Is that a practicable way out of the problem for people not having any specific qualifications (like me!)? Let's give it a try …
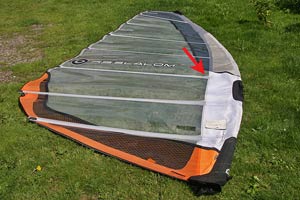
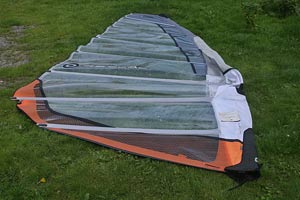
The sail on the operation table is a Neil Pryde RS Slalom 7.8 where the cracks in the luff have spread a little into the monofilm behind the sleeve.
Just a short note: This is a first try, and it’s pretty likely – no it’s most probable – that the repair can be made smarter than the way that’s shown here. Here the first priorities are simplicity (no sewing machine) and durability, and the aesthetical appearance of the repair is not a priority at all.
|
||
|
1.
This is the sail on the operation table: A Neil Pryde RS Slalom 7.8. The arrow indicates where the luff damage has spread into the area behind the sleeve.
Click the picture to enlarge. |
2.
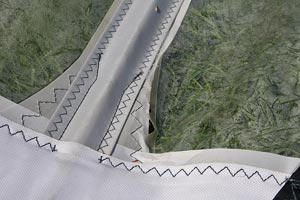
A close up of the damage. It's not difficult to imagine that something's very wrong in the luff inside the sleeve.
Click the picture to enlarge. |
3.
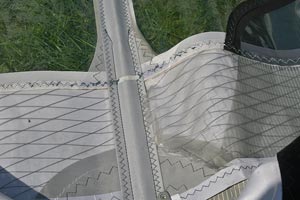
The stitches to the sleeve have been cut. It's much easier to repair the luff if you open the sleeve for a substantial distance.
Click the picture to enlarge. |
|
4.
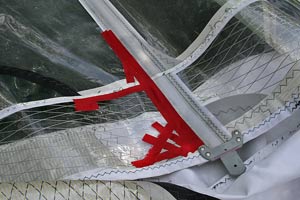
The damaged area. The cracks are positioned along the weakest spots of the area of the luff - mostly along the stitches where the luff is most inflexible and the needle has weakened the material.
Click the picture to enlarge. |
5.
Before the actual repairing work starts the cracks have to be minimized to retain the original shape of the sail. Here some strips of tape fixate the damage area. Be observant that especially the areas around the luff have built in a substantially amount of profile, and some force is needed to minimise the openings of the cracks.
Click the picture to enlarge. |
6.
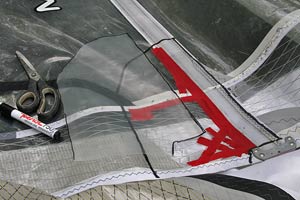
In order to cut some reinforcement material a template is made from some transparent/non-stretching material (here monofilm). Again it's important to take into account the profile of the area. It means that you'll have to try to let the shape of the template reflect the "depth" of the area. As you see I've chosen to let the reinforcement area incorporate the whole batten pocket.
Click the picture to enlarge. |
|
7.
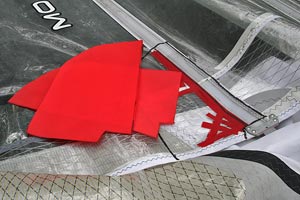
The shape of the template has been copied into a couple of patches made from luff material from an old sail (one to either side of the sail). PERHAPS I should have incorporated a patch of monofilm too - but I decided NOT to do so in order to give the repaired area just a tiny bit of flexibility, and thereby hopefully decreasing the stress in other parts of the luff. Perhaps a wrong decision ...?
Click the picture to enlarge. |
8.
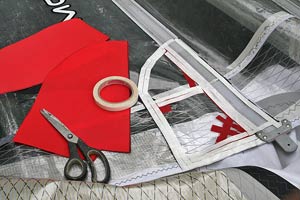
Some double sided tape is glued to the sail in all the places that shall later be stitched. If double sided tape isn't available you can probably get away with gluing the patches to the sail with some quality contact adhesive.
Click the picture to enlarge. |
9.
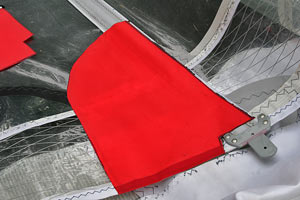
The patch is glued to the sail, and of course the other patch now has to be glued to the other side of the sail.
Click the picture to enlarge. |
|
10.
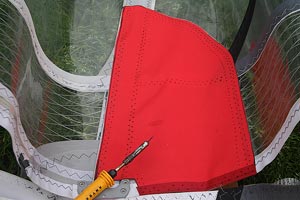
Preparing for stitching (the thread an needle work): In some of the areas - not least the batten pockets - you'll have to stitch through a substantially amount of cloth material, and I choose to burn tiny stitching holes in the material with a soldering iron (the tip filed down to approx. needle diameter). Apart from the batten pocket area it's probably not necessary to "pre-hole" the material - but in this case I did.
Click the picture to enlarge. |
11.
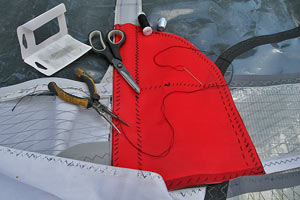
The stitching has started. The thread used is a strong polyester thread. The stitches are made with double thread, and the tong is convenient to pull the needle to the other side, as the double sided tape causes a little friction. As you can see the "sewing tactic" was to first do all the "zigs", and then later do all the "zags".
Click the picture to enlarge. |
12.
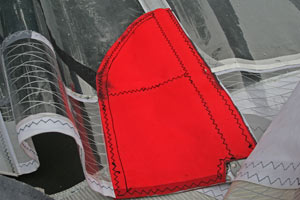
The patches are sewn in place. Now it's time for finishing the work by closing the luff sleeve again.
Click the picture to enlarge. |
|
13.
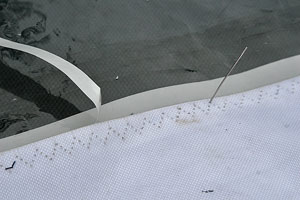
Before stitching the luff sleeve to the sail body the sleeve is glued to the body on either side of the sail. If you want to use the old stitching holes it's necessary to align the holes very precisely (here done with a needle). The other option is to just glue the parts together and then make some new holes (for instance by means of a soldering iron).
Click the picture to enlarge. |
14.
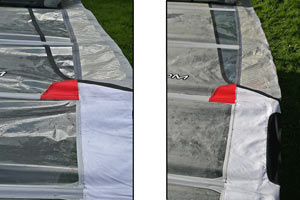
The luff has been stitched to the sail body. As indicated from the picture some simple stitches (picture to the left), were back-upped by some zig-zag stitches (picture to the right). It's probably way strong enough if you do some zig-zag stitches only.
Click the picture to enlarge. |
Well, that's that.
The whole operation consumed some 5 working hours (accumulated from several 1/4 and 1/2 hours incidents). But as indicated it can be done faster by cutting down and streamlining some of the processes.
And now to the crucial question: Does it work? The sail was given back to the guy, who had originally thrashed it, with the agreement that he shall use the sail as often as possible - and sail it without mercy!
The sail has now been on the water a couple of hours (in overpowered conditions and heavy downhauled, the report says!). The owner hasn't detected any luff damages until now, so for now the operation's at least a kind of success. If it'll develop to be a completely success, time will tell ... |
|
Just received a NP RSR 8.4 with a cracked luff from a windsurf buddy. As he's already had the sail repaired professionally twice for the same problem (different places in the luff), he has now given up the sail.
Of course, this is a golden opportunity to examine if you can do the same operation as above - but in a less elaborate (i.e. a more primitive) and a less time consuming way.
Here's the (short) description and conclusion.
|
||
