|
DIY: An even simpler way to repair a cracked luff of a (Neil Pryde RS) race or slalom sail.
There'll not be much explaining here, as a most of procedures are similar to the first and more elaborate cracked-luff-repairing attempt. The main differences - with the aim of trying to cut down the time consumption and costs - are that I'll ...
- be a little more careful not to cut open too much of the sleeve (a time consumption consideration),
- be using contact cement/glue instead of the more professional double sided tape (a cost reduction consideration),
- be cutting strips from ordinary fabrics instead of using the more professional sail tape (a cost reduction consideration),
- be preparing for ALL the stitching by burning stitching holes with a soldering iron (a time consumption consideration).
|
||
|
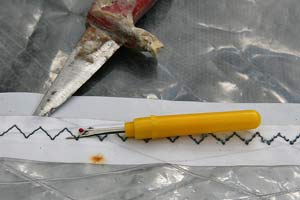
1.
Two ways to cut open the sleeve to get access to the damaged luff. The "knife-method" is the faster way to cut the stitches - but be careful not to damage the fabrics.
Click the picture to enlarge. |
2.
The sleeve's cut open, and there's access to the damaged luff area.
Click the picture to enlarge. |
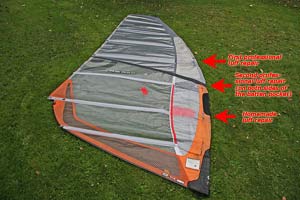
3.
No surprises here - a classical/typical Neil Pryde RS damaged luff as we've seen so damn often.
Click the picture to enlarge. |
|
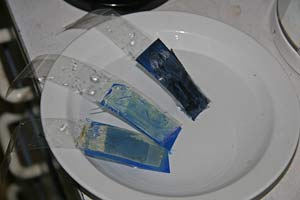
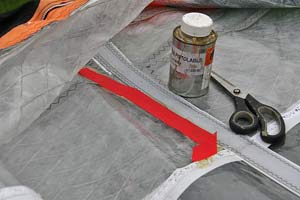
4.
Excuse me for a little deviation: Which glue is the best? A little (extremely non-scientific) test indicates that the best contact cement/glue is the Nautix type (for boom grips). Somewhat behind in efficiency (especially after being submerged in water, as here) is the neoprene glue (meant for wet suits), that's a little better than ordinary (cheap) contact cement/glue.
Click the picture to enlarge. |
5.
The cracks have been "stabilized" in place by gluing some strips of fabric (from a trashed sail) on either sides. In this instance the glue is Nautix contact glue.
Click the picture to enlarge. |
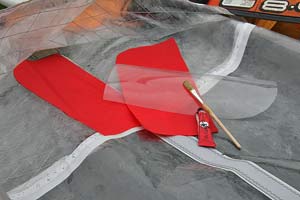
6.
A template is made from some monofilm, and a couple of patches (one for either side of the luff) are copied from the template.
Click the picture to enlarge. |
|
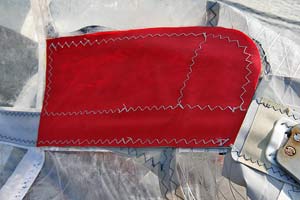
7.
The patches have been bonded to either side of the luff, the stitching holes have been burned by means of a soldering iron, and the stitching work has been done. Now it's time for closing the sleeve again.
Click the picture to enlarge. |
8.
Preparing for bonding the sleeve in place (this time with neoprene glue).
Click the picture to enlarge. |
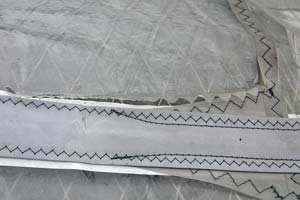
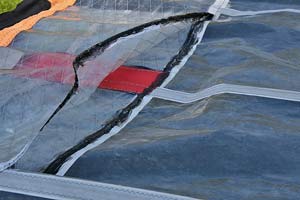
9.
As the sleeve in this instance has been opened before (guess why!), I opted to strengthen the area by gluing a strip of fabric on either side of the sail. As usual the stitching holes were made by a soldering iron. Here you see the repaired area after finishing the stitching job.
Click the picture to enlarge. |
|
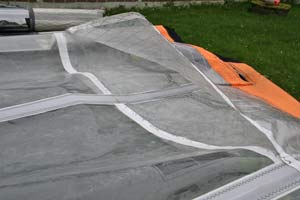
10.
The sail's ready for having the battens inserted again.
It's probably most usual that a Neil Pryde RS sail gets trashed a looong time before having visited a doctor this often. On the bright side: At least there're now 3 spots that probably don't have to be repaired again.
Click the picture to enlarge. |
11.
Time consumption this time amounted to some 2½ hours. This is something around half the time of the first attempt - but of course this time the damages were a little less extensive, as the cracks hadn't spread to the (window-) panel behind the sleeve.
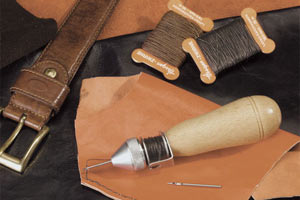
Not using a (special) sewing machine, by far the most time consumption work is the stitching. To ease this process I've chosen to "pre-hole" the fabrics by means of a soldering iron - but perhaps a so-called "Hand-Stitching Device" can be a shortcut to even faster cracked-luff repairs? There're lots of the devices around - the one you can see above is found at http://www3.westfalia.net/shops/household/handicrafts/ and costs $10.
Click the picture to enlarge. |
It will probably take a while before actually trying out this sail, and so there'll be no hint as to the durability of the operated area in the near future. But I don't see why the repair shouldn't be as strong as the first (successful) attempt.
|