|
DIY, raking your fin.
The rake of a fin is just one of the means, fin designers use when they decide what kind of performance (lift, speed, controllability, forgiveness etc.) the fin is aimed to have. But it's a kind of mean that we (the sailors, the end users) can very easily play a little with, if we think the character of a fin doesn't meet our expectations. Simply: The more vertical the leading edge is, the more lift - and the more swept back the leading edge is, the more controllability. Of course, it's advisable not to overdo the "raking instrument", but keep the angles within the spectrum that are more or less accepted within the fin groups (formula fins being the closest to vertical, and freeride, speed and wave fins being the most swept back (not to mention weed fins!)).
It's certainly not rocket science to rake a fin, and the primary reason to show one way (and a rather primitive so) to rake a fin below is to encourage the more cautious people to give it a try. The raking process can be carried out in countless ways, and with just a little creative thinking you can surely do it smarter than what's shown below. Don't be mislead by the number of pictures - which are not proportional with the level of difficulties!
Who knows, perhaps your door of a fin can turn out to be THE weapon to outperform your windsurf buddies?
|
|||
|
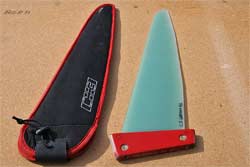
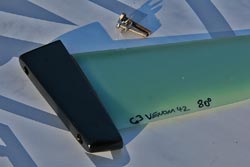
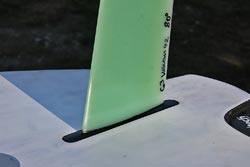
1. This C3 Venom 42 cm fin that has been a real disappointment performance wise - giving less power and grip than my Select SL7 37 cm fin. Hopefully a little more rake forward can make the fin usable. Let's get started ...
Click the picture to enlarge. |
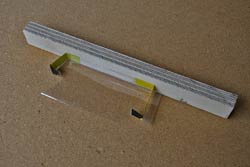
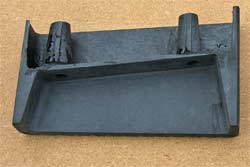
2. You'll have to make a rough mould, preferably from a material the filler material doesn't gets bonded to. Here I've chosen to glue and tape together a mould from monofilm.
Click the picture to enlarge. |
3. The mould is almost done.
Click the picture to enlarge. |
4. To stabilize the mould a little, a piece of wood is glued to the longest side.
Click the picture to enlarge. |
|
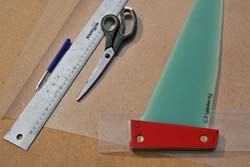
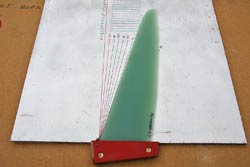
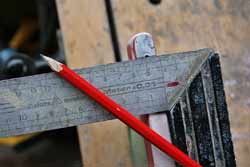
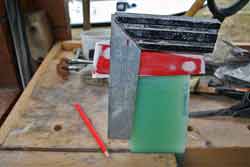
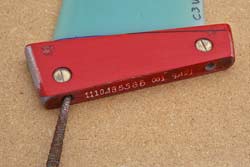
5. To ease the measuring of rake you'll have to use a kind of protractor. You can easily make a protractor on a piece of paper (by bisecting the angles around 6 times) - but if you plan to re-rake several fins you can of course choose to make a more durable protractor from veneer (like the one above).
As can be seen the Venom fin has a rake of a little less than 75 degrees.
Click the picture to enlarge. |
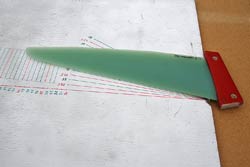
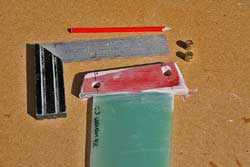
6. Approx. 80 degrees seems to be the "golden" rake of slalom fins, and that's what the venom fin shall have.
You can rake a fin in (principally) two ways: You can either rake the fin by building some material to the fin head next to the blade/next to the leading edge - like indicated in the picture above. In this way the fin tends to be a little shorter (here just under 42 cm.). This is the easiest way to rake a fin.
Click the picture to enlarge. |
7. Or you can rake the fin by cutting some material from the fin head next to the blade/next to the trailing edge - like indicated in the picture above. In this way the fin tends to be a little longer (here approx. 43 cm) - perhaps worth to consider if you plan to rake forward a formula fin with a limit of 70 cm.
Click the picture to enlarge. |
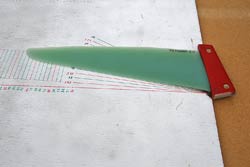
8. But of course you can also find a way in between the two extremes - which will be done here (from "educational" reasons only - it's a little more elaborate). As you can see, the length of the fin will be approx. 42.5 cm.
A line parallel to the end of protractor board are drawn. That's the line that decides how much to remove from the fin head and how much to build to the fin head next to the fin blade.
Click the picture to enlarge. |
|
9. The nuts are knocked out and hidden away for a while.
Click the picture to enlarge. |
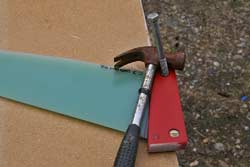
10. Use the line drawn to remove material from the fin head next to the fin blade/the trailing edge. In this case it's been done by means of a saw (very carefully in small incremental steps), a hammer and wood chisel and some filing and sanding devices.
Click the picture to enlarge. |
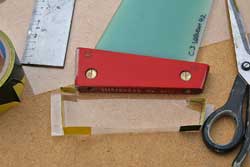
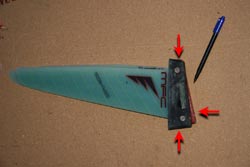
11. Of course, a little more material has to be removed from the fin head. If you place another fin and draw the outline of the fin head on our "victim fin" you'll have some guide lines as to where and how much to be removed.
The red arrows indicates where material has to be removed.
Click the picture to enlarge. |
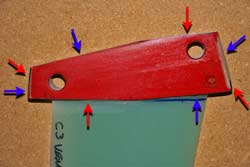
12. The material removing job has been done. And to sum up: The red arrows show where material has been removed, and the blue arrows show where material has to be added - which we'll do now ...
Click the picture to enlarge. |
|
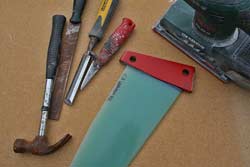
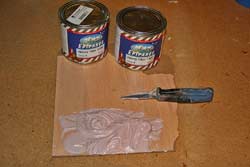
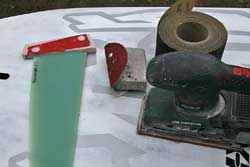
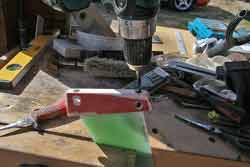
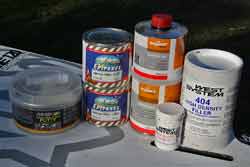
13. The stuff to build up the fin head with is mixed. In this case some epoxy filler is used (at the bottom of this page you can see a couple of other possibilities).
Click the picture to enlarge. |
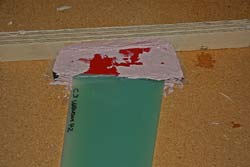
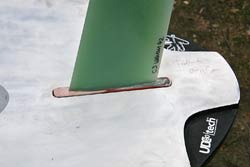
14. The fin head has been placed in the mould made from monofilm, and the spots lacking material have been filled with epoxy filler.
As can be seen the work hasn't been carried out with great accuracy - you'll have to cut, file and sand the fin head anyway.
Click the picture to enlarge. |
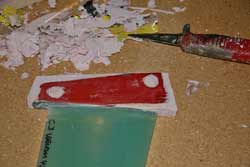
15. The epoxy filler has cured to a consistency where it's stabile in shape, but still easy to work with (cut in with a knife - almost as butter taken from the refrigerator). With this particular filler we're talking about 4-5 hours in room temperature.
The monofilm mould has been removed, and the surplus material has been cut away. Now it's time to let the filler cure to a consistence allowing it to be sanded.
Click the picture to enlarge. |
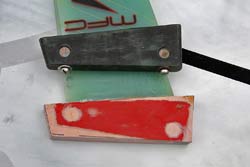
16. Some 24 hours have past, and it's time to finish the job.
Here the outline of the fin head from another fin has been drawn on the fin head we're working with - just to have an indication of where to start shaping the head in details.
Click the picture to enlarge. |
|
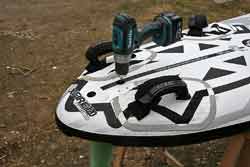
17. And then it's just a matter of sanding, trying to fit the fin head in the fin box of the board it's intended to be used with, sanding more, etc.
Don't get impatient - removing too much material means you'll have to add some more filler and some 24 hours of waiting before resuming the process.
Click the picture to enlarge. |
18. Sand the fin head, so that it (after some rocking and pretty much pressure) sticks out a couple of millimetres from the bottom of the board. The remaining pulling-down work is a job for the fin bolts.
Click the picture to enlarge. |
19. With the fin jammed in the fin box you'll have to mark where the fin bolts shall enter the fin head. Drilling a millimetre or so down the head through the bolt holes in the board is sufficient.
Click the picture to enlarge. |
20. The fin has been taken out of the box again, and a cross line is drawn through each of the two marking holes just drilled ...
Click the picture to enlarge. |
21. ... and continue the lines at right angles to the upper edge of the fin head.
Click the picture to enlarge. |
22. Decide how far away from the edge of the head you want to place the nuts for the fin bolts (here a couple of centimetres are chosen).
Click the picture to enlarge. |
23. The holes for the nuts are drilled.
Click the picture to enlarge. |
24. Now it's time to drill the holes for the fin bolts. If you take sufficient care to drill in the direction of the lines drawn, you'll end in the middle of the holes drilled for the nuts. It's advisable to drill a little further, so that the fin bolts don't "explode" the fin head, should they be screwed through the nuts.
Click the picture to enlarge. |
|
25. The nuts have been placed and aligned, the fin bolts have been cut in the right length - and the fin head has been exposed for a little finishing work (basically paint) ...
Click the picture to enlarge. |
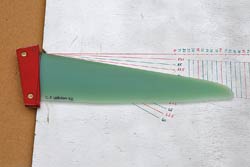
26. ... and when tightening the bolts the fin fits properly down in the Tuttle box. Time to test the fin ...
Click the picture to enlarge. |
|
|