|
DIY: Shortening of a Neil Pryde X9 boom.
The cause for taking up this topic is that Neil Pryde is currently emptying the stock of outdated long X9 booms (260 - 310 cm) - booms that are way too long to be sold in this new era of cut-out clews. The prize in my country (Denmark) is lowered to around 533 Euros, which is well under half the normal price.
In this example the shortening of the boom is 40 cm, and that's about the most you can cut off a X9 boom if you want to retain the possibility to adjust the boom with 50 cm.
|
||
|
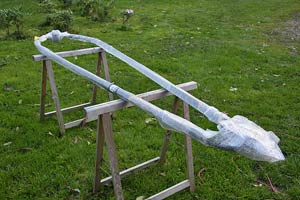
1.
A brand new Neil Pryde 310-260 cm boom is ready on the operation table.
Click the picture to enlarge. |
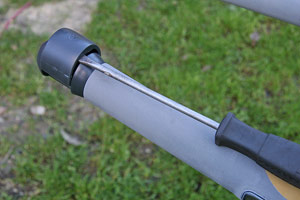
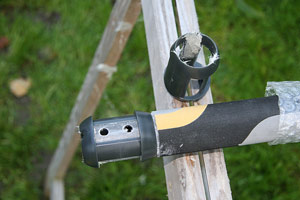
2.
The pin part of the trim lock mechanism is removed.
Click the picture to enlarge. |
3.
Pretty often the glued-on part of the trim lock mechanism can be knocked off right away. If this isn't the case, dipping it in hot water will probably loosen it ...
Click the picture to enlarge. |
|
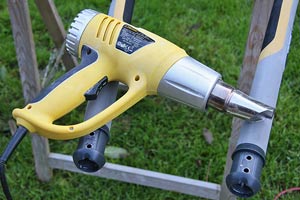
4.
... or you can loosen it by means of a heat device (don't over-heat!).
Click the picture to enlarge. |
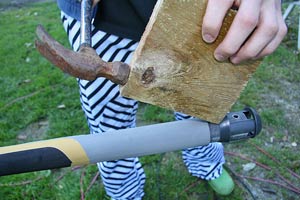
5.
The glued-on part of the trim lock mechanism is knocked off (gently, if you want to be sure not to destroy it).
Click the picture to enlarge. |
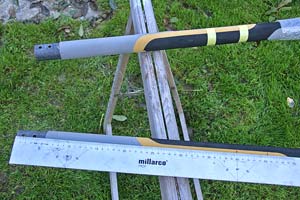
6.
Mark where you want to cut the tubes, and also mark where to remove the grip. In this case the boom is intended to be 40 cm shorter than the original length - making it a 270-220 cm boom. 40 cm is about the most you can cut off, if you want to retain the 50 cm trim option. Of course you can cut off (say) 60 cm, but to make (a little!) sense you'll then have to cut off 20 cm from the boom end, making the new boom a 250-220 cm boom (and thereby easing the boom a few grams).
Click the picture to enlarge. |
|
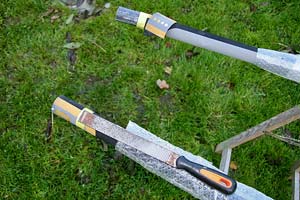
7.
The tubes have been shortened 40 cm, and now you'll have to remove some grip material, so that the trim lock parts can fit over the boom tubes. Sometimes the grip is glued on so poorly that you can remove it with your bare hands - otherwise you'll have to use a knife or a file.
Click the picture to enlarge. |
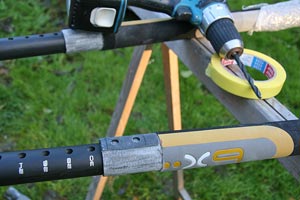
8.
Now you'll have to drill some holes, so that the pin parts of the trim lock pieces can hit the holes in the boom end. A little precision is needed here, so why not make a shape (pattern) from one of the cut off tube pieces?
Click the picture to enlarge. |
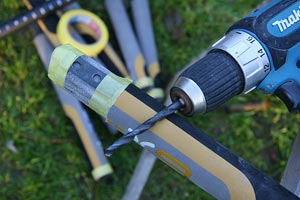
9.
The shape is fixed with tape and ready for drilling.
Click the picture to enlarge. |
|
10.
The holes are drilled, and one of the trim lock pieces is glued on. You can use almost every thing for this glue job (epoxy resin (best), contact cement, fibre filled polyester putty (used here), or ...).
Click the picture to enlarge. |
11.
Just to show that if you're unlucky to destroy some of the trim lock pieces, you can buy some replacement parts from Neil Pryde/your local windsurf pusher).
Click the picture to enlarge. |
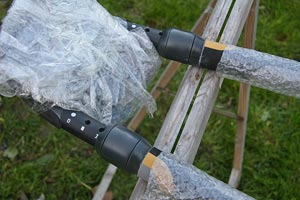
12.
The boom is shortened and ready for use.
Click the picture to enlarge. |
|
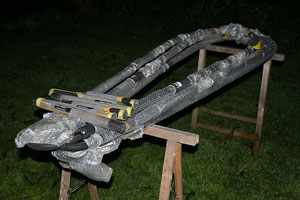
13.
As you've seen this is a minor operation. Here 3 booms have been modified within a couple of hours. The cut off tube pieces can easily be modified to downhaul devices - but that's another story ...
Click the picture to enlarge. |
|
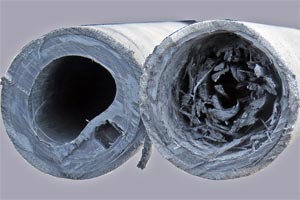 14.
Booms from other brands.
However, sometimes you get surprised. For instance when trying to shorten
a Nautix Carbon boom (at least the older ones) you risk that the tubes are
irregular shaped
i
or filled with very long and strong "corks" from carbon weave. There's no
way you can get away with shortening this kind of boom, as it's impossible
to make room for the extension.
Click the picture to enlarge. |