|
DIY repairing a cracked Starboard wood deck.
There are lots of ways to repair a cracked or otherwise damaged Starboard wood deck, and I'm not arguing that this way is the "correct" or easiest way of doing it. However, it's a durable and fairly easy way, and given the damage characteristics in this example it's probably also a good solution.
So, what kind of damage are we talking about?
1. The deck has cracked - and we're not talking about a crack confined to the fine wood layer only. The whole laminate (the sandwich) is cracked, giving water access to the core material. 2. The area around the crack is definitely soft, and a little water is coming out of the crack when you press the area - of course indicating the core to be wet. 3. The upper few millimetres of the core material is not only pretty wet - it's also so damaged (soft), that it has to be removed. 4. The guy who owns the board, is judged to be interested in a repair that involves a kind of wood structure as opposed to a very visible painted area.
Now, let's get to work.
|
|||
|
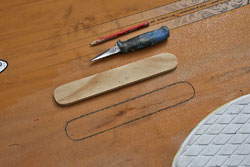
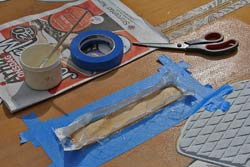
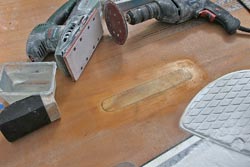
1.
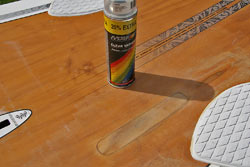
The crack has been roughly measured, and a piece of veneer has been cut in a shape to cover the damaged area. In the picture you see that a line has been drawn around the damaged area matching the contour of the piece of veneer. a) It's of course easier to FIRST cut the piece of veneer and THEN draw the outline on the deck than the other way around. b) The thickness of the veneer? Well, you'll have to guess how much of the (probably soft/wet) core material you'll have remove. If the deck has a lot of curvature in the damaged area, you'll have to take that into account too.
Click the picture to enlarge.
|
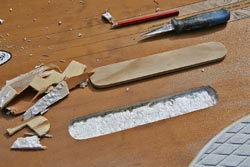
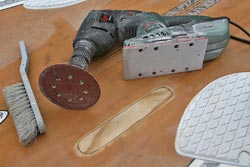
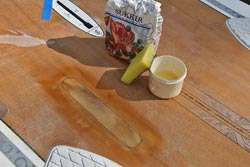
2.
The original laminate of the deck (veneer, sandwich material and glass weave) has been cut away along the line drawn. Here, simply a sharp knife has been used, and it's of course better to start removing too little than too much.
Click the picture to enlarge.
|
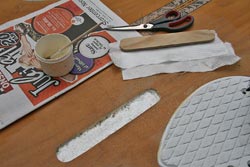
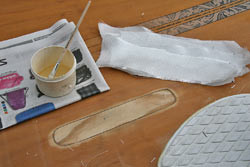
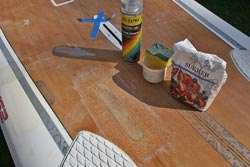
3.
A little core material has been removed, so that the veneer piece fits nicely to the "cut out" - and the place has had its time to dry out. Now it's time to prepare placing the piece of veneer in the deck: Some epoxy resin has been mixed, and some pieces of glass weave have been cut.
Click the picture to enlarge.
|
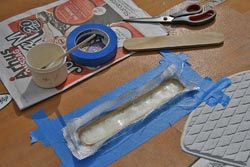
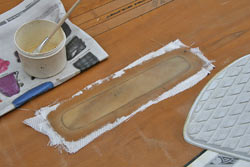
4.
To avoid too much of a mess some tape has been placed around the hole, and (more importantly) the wetted pieces of glass weave have been placed into the hole.
Click the picture to enlarge.
|
|
5.
The piece of veneer has been placed into the hole and aligned with the top of the deck. Now it's time to await the curing process ...
Click the picture to enlarge.
|
6.
The epoxy has hardened up, and the area (our piece of veneer and the original veneer around) has been sanded a tiny bit below the level of the deck. As the original Starboard veneer is very, very thin, be careful not to sand away too much material.
Click the picture to enlarge.
|
7.
Ready for laminating a couple of pieces of glass weave to the sanded area.
Click the picture to enlarge.
|
8.
The area has been covered with the glass/epoxy laminate. Time to wait for the epoxy to cure.
Click the picture to enlarge.
|
|
9.
The epoxy has cured, and the area has been sanded in level with the deck. As you see, some wet sanding has finishes the job.
Click the picture to enlarge.
|
10.
Now it's time for some non-skid treatment. Here I've chosen to put on a very thin layer of epoxy resin by means of a sponge. If the epoxy is too cold (below around 15 degrees C) it's difficult to put on a layer that's sufficiently thin.
Click the picture to enlarge.
|
11.
Some sugar has been spread over the area (superfluous sugar has been blown away). Curing time again.
Click the picture to enlarge.
|
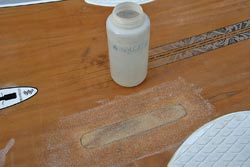
12.
The epoxy with the sugar has cured, and it's time to remove the sugar (leaving a lot of "burrs" in the epoxy that form the non-skid). A bottle of lukewarm water is ready to dissolve the sugar.
Click the picture to enlarge.
|
|
13.
The sugar has been dissolved and rinsed away, and the area has dried. The repair is finished - but of course some more curing time never does any harm ...
Click the picture to enlarge.
|
14.
Just a short note with no relevance to this repair: If you plan on making some non-skid coating in the manner shown here, you'll have to take into account that it's normally pretty difficult to get hold of epoxy that's UV-resistant. This means, that coating light painted areas (for instance white) the coating will provide the area with a pretty un-charming yellowish tint. Apparently you can minimise (NOT avoid) this unwanted effect by keeping the area away from sun/daylight in the curing period - and you can also try to spray the area very, very lightly (it's supposed to be non-skid!) with some UV resistant clear varnish, when the epoxy has cured.
Click the picture to enlarge.
|
Here are a couple of general hints when you're doing some epoxy repairing work on a board:
1. It's best to repair a board that is slightly contracting. If it's expanding you risk some bubbling and the epoxy/weave material may not bond properly to the board material. So, a good time for the epoxy work to take place is late afternoon or evening, where the board is cooling down from the heat of the day.
2. The "right" tool to laminate with is a "squeegee" (a rubber scraper), but for minor works (like here) you can get away with using a brush. However, you'll have to beware that small bubbles are not trapped under the weave.
3. It's preferable to let the weave get wetted "from beneath" - and be careful to use only just enough epoxy resin (the strength comes from the weave - the epoxy is "only" bonding the layers of weave).
4. If you're very enthusiastic you can pack the repaired area air-tight (for instance in a plastic bag) and put it under vacuum (for instance using a pump from a refrigirator) until the epoxy has cured. However, normally that's kind of overkill ... |
|